Regardless of whether you want to minimize costs, keep more control, or just add your personal touch, designing your own wedding invitations can be a fun and rewarding endeavor.
In this guide, we want to walk you through the process step by step to easily create wedding invitations that are so polished and sophisticated that your guests never know you've pulled them together yourself.
We'll show you how you can turn your invitations from a simple idea into fully made cards, from choosing a design to buying stationery and printing. We also give you our practical tips on how to avoid common mistakes and how to save time.
We will cover the following:
- Benefits of creating your own wedding invitations
- Find inspiration and ideas
- Choosing the right style of invitation for you
- Test your idea
- How to make your wedding cards step by step
Benefits of creating your own wedding invitations
Each couple has their own motivation to take their wedding invitations into their own hands. However, here are the reasons why our customers choose this route most often.
To mark

A wedding is often a showcase of the couple's style and personality, and invitations are no exception. It is only natural for a couple to give their invitations a personal touch. It is often a couple's first project together!
Finally, your wedding invitations show your personal taste and give your guests an insight into your wedding theme. Why don't you want to be involved in making them?
When you create your own invitations, you can use your creativity. It is a great opportunity to explore your artistic side. And you can even turn parts of the project into an excuse to connect with your wedding reception, friends, and family as they help you create the invitations.
keep control

There is nothing wrong with being closely involved in the creative and decision-making process when it comes to your wedding cards.
Hiring a stationery retailer for the entire project goes well with some couples, but is not suitable for everyone. Many of our customers want to make their invitations more practical in every way to ensure that they get exactly what they're going to do.
If you do it yourself, you are in control of the process. Since you are the designer, you can choose the design, color and word formats that you like. Play around with options until you find the one that feels just right.
Instead of waiting for the final cards to be delivered and figuring out whether you like them or not at this point, you can see the results of your DIY project at every stage and make adjustments as you go.
It removes the stress of not accepting poorly made cards that you paid for. And as an added bonus, you will likely be very proud of your accomplishment when friends and family compliment you on the cards you produce.
Manage costs
Some methods of creating your wedding invitations can get quite expensive. However, using the methods described in this guide will give you a fraction of what you would have paid a design and printing professional to do for you.
Find inspiration and ideas
Are you ready to accept your own wedding invitations? The first step is to be inspired and determine what you want.
What to look for
Invitations come in thousands of colors, shapes, cuts, sizes, paper styles, and more, which can feel overwhelming at times. However, once you narrow down what's important to you, everything becomes a lot easier. Here are some considerations to consider:

- Feasibility: Is this really a style or type of printing that you can do yourself without special commercial equipment? (For example, custom shape cuts and letterpress printing are usually not suitable for do-it-yourselfers.)
- affordability: If one of your do-it-yourself ways is to keep costs under control, avoid falling in love with exotic invitation styles that contain specialty papers and other very individual items.
- Skills: While you may be drawn to highly intricate graphic elements, it may not be your skill to recreate these effects without formal training and software for graphic design. Our templates offer many of these elements for you, but generally leave the more complicated effects to the professionals.
- Colours: Narrowing down the color scheme for your invitations is usually not very difficult if you already know what your official wedding color palette will look like. Don't just limit yourself to invitation options that include these colors in the papers themselves. You can often buy an invitation kit or papers in neutral colors and simply implement your custom color scheme in the color of the ink or use embellishments such as ribbons, seals or laces to add a second or third color to your finished invitations.
- Video: https://www.youtube.com/watch?v=AhHcuztLJQo
- styles: What types of invitation styles do you wear? Vertical or horizontal? Pocket fold or simple one-card designs? Cards with embellishments like ribbon and lace? Individual flat screens or invitations with borders and layers?
- Paper: After exploring the options, you may have set your heart on a specific type of paper, such as: B. a shimmering finish or a linen structure. Just make sure you use high quality maps. A simple design on high-quality cardboard always looks better than an exotic design on cheap paper.
If you are looking for inspiration for your DIY wedding invitations, you first want to consider how feasible this will be for you.
On-line

You can get lots of ideas from blogs, websites, Pinterest, Instagram and YouTube videos. Here are some inspiring ideas for your wedding invitation that we've put together to get you started.
Wedding Magazine
While most wedding magazines contain invitations that have been designed by their advertisers and may not be affordable for you, these designs can be a great source of inspiration. Consider color combinations, fonts, accents, embellishments, and invite styles to narrow down your personal preferences.
Choosing the right style of invitation for You
Creating your own invitations can be very complex or surprisingly easy.
Since we are concerned with reducing stress through beautiful wedding invitations, we will determine the easiest way for you to create breathtaking invitations: Printable wedding invitation kits,

Yes, if you are looking for a bigger challenge or a more intensive project, you can definitely source any material for your invitations, from paper to overlays, trimmings, and accents. This is certainly an option, but it is more for purists as it takes much longer and is generally the more difficult way to do it.
If you want to save time, keep control, make your invitations affordable, and still want to be closely involved in the entire creative process, it is often much better to start with a kit.
Read on and you will quickly get a feel for how this works and if it is right for you.
How printable invitation kits work
It's really pretty easy.
- Choose the style of invitation kit you want (see options below).
- Choose your colors and how you want to embellish it (embellishments, ribbons, etc.)
- Order the kits and accents (you can start with a sample first)
- Customize the invitation and the accompanying inserts (instructions, reply card) and print them on the card supplies included in your kit
- Place your printed invitations on the back of the card, add all layers and embellishments and, if necessary, put additional cards in your pockets
- Stamp and send your invitations
Video: https://www.youtube.com/watch?v=ZBDBlMgEYig
You want to save time and make it easy
Would you like to create your own invitations without feeling like a second job? If the wedding planning has taken on a life of its own and you are meeting deadlines, a faster invitation is appropriate.
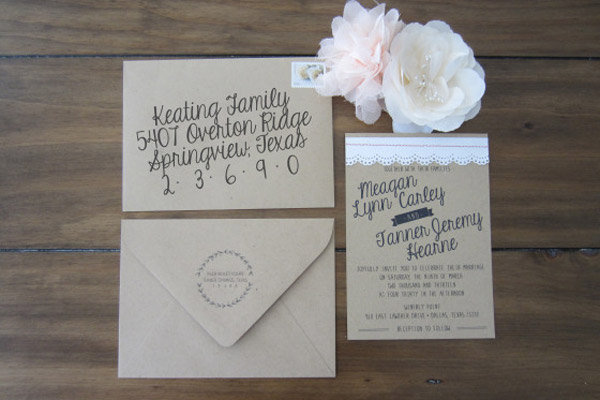
Some invitations take a lot less time, e.g. B. the single card style.

This simpler DIY wedding invitation only requires the announcement, so the information is placed on a card. If you would like to provide further details to your guests, you should add the address of your wedding website to the invitation with a card. This way they can visit their official website for more information.

If you want to keep it really simple and save time, avoid additional elements like ribbon or layers. While these additional features are great, they can extend the overall production of the final invitation.

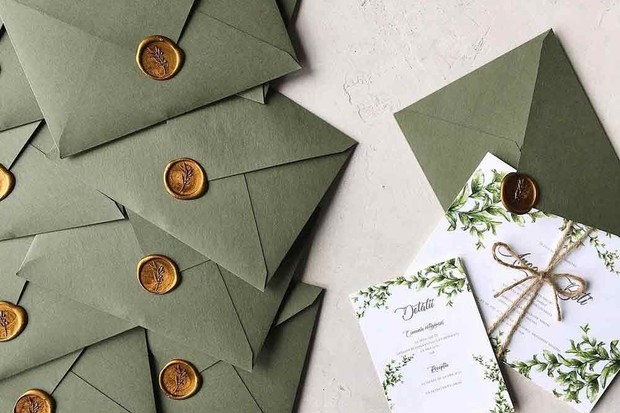
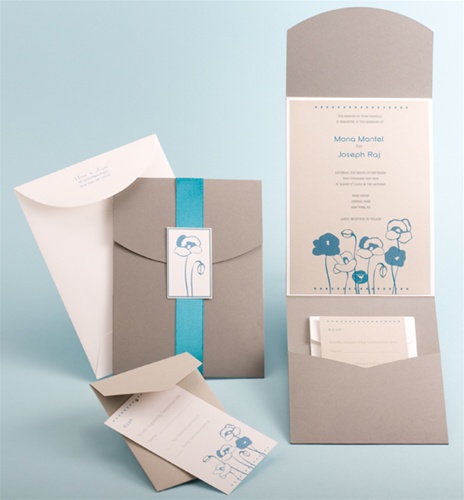
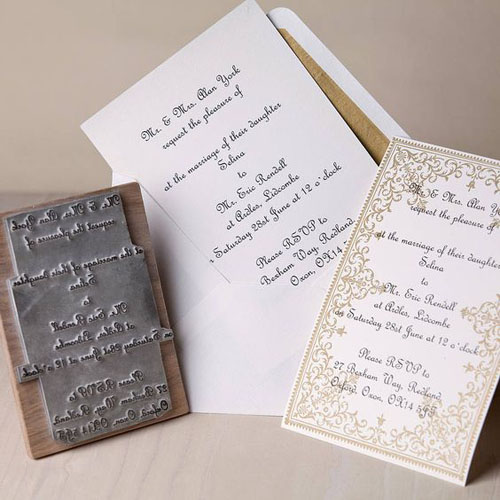
You want to keep it formal
Formal or traditional wedding invitations are sophisticated and classic. Because of the additional parts that come with the invitation itself, they may take a little more time, but are generally worth the extra time and effort. At least a formal wedding invitation often includes the wedding invitation, the reception invitation and the reply card.
 100 VW, 857 pixels")
A pocket invitation wedding invitation kit is the perfect solution to hold all the necessary inserts. It can usually hold more cards and is ideal if you have additional information that you want to provide to your guests.
 100 VW, 960 pixels")
In addition to the invitation itself, a typical pocket fold kit includes two or three additional cards. two larger inserts for directions, maps, gift list, event details or the menu and a smaller insert for an RSVP reply card.
Would you like to spice up your formal invitation? Consider adding a parchment overlay to achieve the special effect. Parchments used to be traditional, but today they are a simple and inexpensive add-on that gives an unexpected flair to a wedding invitation.
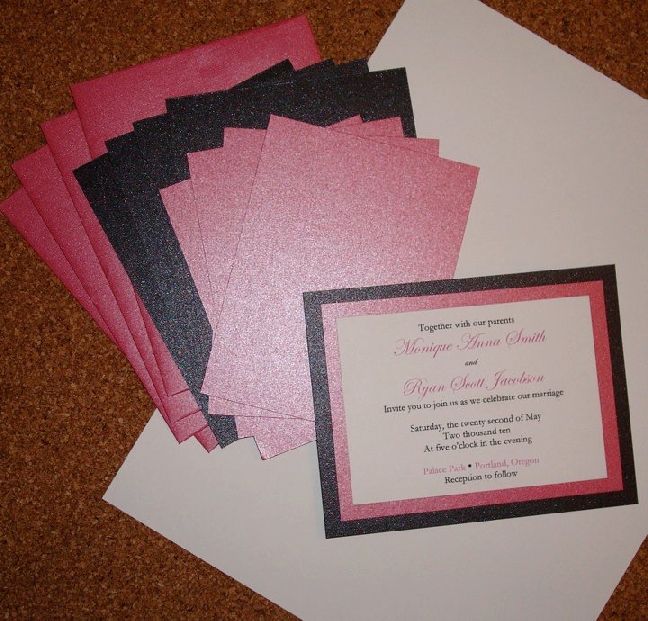
You want to create a luxurious look
 100vw, 1200px")
Start with gold. Metallics are a classic symbol of opulence and prosperity. This special invitation kit (see below) gives the soft organza ribbon an extra touch of waste.
Video: https://www.youtube.com/watch?v=TxrjjcEtL8s
Another way to give your invitations an upscale look is not just to choose a metallic or shimmer finish, but also a high quality textured finish like linen. In any case, it is the effect and the appearance of the invitation card when your guest removes it from the envelope that leaves a rich impression!
 100 VW, 860 pixels")
You want to cut costs
If your motive for running your own wedding invitation production is to cut costs so you can enjoy yourself in other areas, look for scaled-down invitation sets and paper options that are free of embellishments and extras.
 100 VW, 960 pixels")
For example, many of our customers love our blank invitation kits in white and ivory because they are very accessible for only $ 0.20 per invitation and still give you the flexibility you need for your own design.
 100 VW, 960 pixels")
With these kits, you can continue to add colors and design elements such as frames, graphics, or flourishes using a simple home printer or printing service.
Start with one of our free print templates, like the one shown below, and change them with your colors, fonts, and any graphic elements you'd like to add.
Photo: GS Border Template for simple white invitations
These kits come with printable, pre-cut invitation cards on which you put all the relevant wedding information and envelopes. There are no additional cards or embellishments, which means you can make significant savings.
You are a minimalist
Are you looking for a streamlined design that skips the extra extras and has a clean, polished appearance?
 100vw, 1200px")
One option is a single card invitation style that includes a frame. It is limited to design aspects, but has just enough dimensions to give it character.
 100 VW, 960 pixels")
However, if you need space for a few more parts, e.g. For example, an RSVP card and instructions, but don't want the extra bulk to be overwhelmed with additional design elements, stick to the simplest options for pocket folding invitation kits, which excludes extras like ribbon or lace.
 100 VW, 860 pixels")
When creating your printable template, skip flowers, curlicues, or special graphics to minimize the appearance.
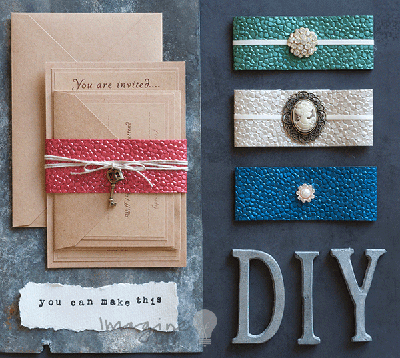
You like a touch of vintage or charm
A great way to add a bit of Victorian elegance is to use accents such as lace that add charm and grace to everything that adorns them.
 100 VW, 960 pixels")
Damask patterns and oval shapes are also reminiscent of centuries and can give your invitations a wonderful retro feeling.
 100vw, 1200px")
For a charming and elegant effect, you should add a ribbon that can turn an average invitation into an exceptional presentation. The ribbon color you choose can complement or contrast, but has a strong impact in both cases.
Video: https://www.youtube.com/watch?v=5AhUKBJTS1I
Test your idea
Few things are more heartbreaking for a engaged couple than discovering that your amazing wedding idea didn't go as planned as you planned.
When it comes to your wedding invitations, you can completely avoid disappointment by taking a little more time to test your invitation idea with a card pattern first.
Decide how you want to print
Before proceeding with your test, you should consider how you want to print the invitation yourself. This is the paper on which your custom wording and announcement are printed.
Below are instructions to help you figure out which option is best for you.
And if after reading our tips you are still not sure whether you can always print and rate at home as soon as you see the print quality. Fortunately, today's home printers produce prints of such excellent quality that it is difficult to say whether they were done professionally or not!
Print yourself
Printing your invitations yourself can bring a high level of satisfaction and performance. Not only do you get a design that reflects who you are as a couple, but you did it all yourself!
How do you know if printing is for you yourself?
The main thing you need is a good quality inkjet printer, i. H. Not the old printer you inherited from your brother 10 years ago after graduation. The best thing is a printer that has been bought somewhere in the past 5 years and that still works well.
In addition, Microsoft Word must already be installed on your computer, especially if you want to use one of our free downloadable design templates to get started.
You will of course need some time to sit down and design your invitations, but even if you have them done professionally, you still need time to sit down with your graphic designer and choose style, wording, decorations, etc.
You need to feel comfortable putting the printed cards together and putting everything in the envelopes. Many wedding couples make it a fun shared experience, either with friends or family, or both. This is a great way to bring the two families together in a collaborative social environment!
Outsourcing of printing services
If you have a laser printer (that doesn't print small card sizes), or you don't have a printer at all, or just want someone to print, you can always hire a professional printer to print your invitations for you. We made it easy for you to do this by providing a new option for our free downloadable design and print templates.
To start designing, simply click the Print Templates button on the product page where you bought your empty invitation kits and select the "Apply to Printer" option. As a result, preformatted templates suitable for 8.5 x 11 cards are downloaded to your hard drive, which your printer needs. These templates have existing cut marks so that your print shop can print them and cut them to the correct size.
Once you've customized your design template, simply save it in your email or on a flash drive or floppy disk and go to the print shop with the map material we sent you in your order
Outsourcing printing services can be a more efficient option if your invitations contain lots of images or dark backgrounds that require a lot of ink.
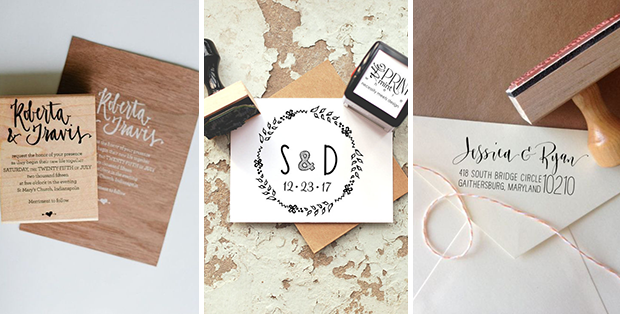
Decide how you address
Your return address and the address of the guest you invite must be added to your envelopes as part of the DIY wedding invitation process. It is helpful to decide in advance how you want to do this step.
Addressing options:
Depending on the finished product you imagine, you have some nice ways to add the return and delivery addresses to your envelopes.
- Write the addresses by hand
- Let friends and family to help you with the project hand write the addresses for you (choose someone whose natural handwriting you love).
- Print the return addresses and the delivery addresses of the guests on peel-and-stick shipping labels
- Hire a calligrapher to professionally address each envelope and achieve the most elegant look
Some additional tips for addressing:
- If you're looking for a formal invitation, enter the correct title for the guest, e.g. B. Mr., Mrs., Professor or Dr., in the address list, which you make available to the person who addresses the envelopes
- Check your mailing list several times before printing a list for the person addressing your envelopes or before printing on shipping labels. Look for missing addresses, misspellings, missing or misspelled names, and other errors. Also make sure that the address provided for each person is the current and correct one.
Order a sample
Each wedding invitation set we offer includes the option to order a single pattern, including any embellishments you add as an image, such as: B. ribbon and lace. Just click the "Order a sample" button to get started.
If you are concerned that the color of the invitation personally will not look like your local computer screen, or if you just want to touch the paper with your own fingers before making your final decision, a pattern will be created to calm your concerns. They are easily affordable (typically $ 2.50 or $ 3.00 each and free shipping) and come with pressure test sheets that you can experiment with.
Do your test
After you order and receive your sample invitation kit, you need to do the following to create a finished design for review:
- Home inkjet printer (or professional printer)
- Microsoft Word
- Standard printer paper (when printing at home)
- Sample kit you ordered
Step 1: Download the free printable wedding invitation template you want to try
Step 2: Customize the template with the fonts, formulations, formatting and ink colors you have selected
Step 3: Before you test the map material included in your sample kit, print your custom template on your own standard printer paper. Repeat this step until it looks perfect and you are satisfied with the end product. (Alternatively, you can work with a local printer to have this part of the invitation printed for you.)
If you are printing from a commercial print shop, ask them to print test samples on normal printer paper before printing on your sample card paper.
Step 4: When you are satisfied with printing your invitation on standard printer paper, print out the card stock paper that is included in the sample invitation kit you ordered.
Step 5: Attach your printed invitation to the invitation pad with double-sided tape.
Step 6: Assemble all other elements of your invitation kit, e.g. B. ribbon or lace.
Step 7: Rate your invitation and make sure you love it!
Step 8: Check your invitation wording double and triple for spelling, grammar or label errors and save your invitation template for your final edition.
Step 9: Order your invitation kits – you will usually receive them within 3-5 days.
Step 10: After receiving your invitation kits, follow the steps below to create your own wedding invitations
How to make your wedding cards
 100 VW, 860 pixels")
Your design has been selected, your pattern has been approved, and your invitation kit order has arrived. What now?
preparatory work
Start early enough so you don't have to hurry to meet your deadline. When planning a date for the completion and delivery of your invitations, allow enough time for printing, assembly, mail delivery time, and the advance notice your guests need to attend your wedding.
Consider setting up a special room or a large room in your house specifically for the production process.
Get a spacious work area where you can conveniently leave the stationery and work again the next day if your schedule does not allow you to complete the process in one session. Make sure you assemble everything in one place.
If it helps, create small "stations" in your work area, e.g. B. an assembly line to make production as efficient as possible. This is particularly helpful when other hands lend a hand.
Plan the help of friends and family to reduce your workload. Make it fun with a DIY party! Serve snacks and refreshments, make music and have an entertaining evening with loved ones.
stamps
Die Kosten für Briefmarken hängen vom Gewicht der Beilagen ab. Bringen Sie Ihr fertiges Einladungsmuster zur Post, um festzustellen, wie viel Briefmarke Sie benötigen. Die meisten von ihnen werden zwischen 1 und 2 Unzen sein.
Wenn die Post dekorative Briefmarken anbietet, die Ihr Hochzeitsthema ergänzen, können diese Ihren Umschlägen etwas mehr Eleganz verleihen.
Kaufen Sie das gesamte Porto, das Sie für Ihr Projekt benötigen.
Schließen Sie Ihre Einladungen ab

Zu diesem Zeitpunkt wurden Ihre Einladungen bereits anhand der Vorlage angepasst, die Sie während Ihrer Testversion ausgewählt haben.
Es ist jedoch immer eine gute Idee, die Einladung, die Sie zuvor in der Beispielphase gespeichert haben, erneut zu besuchen und von einer anderen Person erneut auf Rechtschreib-, Grammatik- oder Etikettefehler überprüfen zu lassen. Es mag wie ein Overkill erscheinen, aber Sie werden erstaunt sein, was ein neuer Satz Augen auffangen kann.
Schließen Sie Ihre Einladung ab und stellen Sie vor dem Drucken sicher, dass sie korrekt ist.
Drucken zu Hause
Wenn Sie zu Hause drucken möchten, nehmen Sie sich genügend Zeit, um die Einladungen zu drucken.
- Stellen Sie zunächst sicher, dass der Drucker ordnungsgemäß funktioniert. Möglicherweise möchten Sie einen Testdruck Ihrer Einladung auf normalem Druckerpapier drucken, um sicherzustellen, dass der Drucker ordnungsgemäß funktioniert.
- Führen Sie einen Test mit der Testkarte aus den Einladungskits durch den Drucker. Wenn das Ergebnis gut ist, geben Sie das Papiermaterial an den Drucker weiter und drucken Sie Ihre benutzerdefinierten Einladungen.
- Wir empfehlen, dass Sie in kleinen Stapeln anstatt in einem großen Stapel von 50 oder 100 Karten drucken. Bleiben Sie beim Drucker, um Änderungen an Tinte und Druck zu überprüfen, damit Sie den Drucklauf stoppen und gegebenenfalls anpassen können, bevor Sie zu viele Kartenvorräte verschwenden.
Drucken bei einer lokalen Druckerei
Outsourcing Ihres Drucks an ein lokales Unternehmen? Folge diesen Schritten:
- Kopieren Sie Ihr endgültiges, fertiges Einladungsdokument auf ein Flash-Laufwerk oder eine Festplatte
- Holen Sie sich Ihre Kartenvorräte und das Flash-Laufwerk oder die Diskette, um sie auf Ihren Drucker zu bringen
- Lassen Sie Ihren Drucker einige Probedrucke Ihrer Einladung auf normalem Druckerpapier ausführen, um sicherzustellen, dass Sie mit der Druckqualität zufrieden sind
- Wenn der Druck zu Ihrer Zufriedenheit erfolgt ist, stellen Sie Ihrem Drucker Ihr Einladungskit zur Verfügung und lassen Sie Ihre Einladungen ausdrucken
- Lassen Sie Ihren Drucker auch die gedruckten Einladungen auf die richtige Größe zuschneiden, die Sie für die Montage benötigen – dies erspart Ihnen diesen zusätzlichen DIY-Schritt.
- Wenn Sie fertig sind, nehmen Sie Ihre gedruckten und geschnittenen Einladungen und bringen Sie sie zur Montage nach Hause
Versammlung
Endlich ist es Zeit, Ihre eigenen Hochzeitseinladungen zusammenzustellen!
 100 VW, 1158 Pixel")
Wenn Sie Montagehilfe erhalten:
- Richten Sie organisierte Fließbandstationen in Ihrem Arbeitsbereich ein, bevor Ihre Gäste ankommen.
- Lassen Sie bereits einige Mustereinladungen zusammenstellen und stellen Sie jeder Station ein Muster zur Verfügung, damit sie das fertige Produkt sehen können, um zu verstehen, was zu tun ist.
- Drucken Sie Ihre endgültige Gästeliste aus und überprüfen Sie sie auf Namens- und Adressfehler oder fehlende Adressen. Legen Sie diese gedruckte Liste mit hochwertigen Stiften in die entsprechende Station. Auf Wunsch können Sie Ihre Gästeadressliste auch auf Aufkleber-Adressetiketten drucken.
- Schreiben Sie Ihre Absenderadresse auf. Stellen Sie diese mit hochwertigen Stiften in die entsprechende Station. Falls gewünscht, können Sie Ihre Absenderadresse stattdessen auf Adressetiketten drucken.
- Sammeln Sie die Briefmarken, die Sie für Ihr DIY-Einladungsprojekt gekauft haben, und platzieren Sie sie an der entsprechenden Station
- When you assign an assembly line task to each person, provide them detailed instructions and watch them execute it several times to make sure it has been done correctly before moving on to your own work.
Steps for assembly:
Depending on the type of wedding invitation kit you ordered, your do-it-yourself wedding cards will involve some or all of the followings steps:
- Add return address, guest delivery address and stamp to each envelope
- Attach the printed invitation to the invitation backing card with double sided Scotch tape
- Add embellishments, such as lace or ribbon to the invitation, if applicable
- Insert any additional printed invitation pieces, such as RSVP card or directions, into the pocket fold, if applicable
- Fold up the invitation, if applicable
- Insert the finished invitation with all inserted pieces into the stamped, addressed envelope and seal, including adding any specialty envelope seals, if desired
- Drop off your sealed, stamped and addressed envelopes at the post office for delivery when ready
Video: https://www.youtube.com/watch?v=EGUrcmtSTII
You Did It!
Creating your own customized wedding invitations is an incredible accomplishment and something to be proud of!
We had a customer once tell us that when she handed the finished invitation to her fiancé he looked at it and teared up, he was so overcome by the beauty of the invitation.
With quality invitation kit products to make the process simpler and the end result more luxurious, your guests will probably never know that you actually put your own invitations together…but you will!